I WAS a transplanted California girl who found herself in beautiful Colorado which became 8 of the best years of my life! I'm now back in California, but the name Landlocked Island Girl kind of stuck! I hope you find some inspiration in my work and I'm SO thankful that you've stopped by.
Monday, December 26, 2011
Merry Christmas
This year, I decided to do formal seating for Christmas Dinner, then at the last minute I decided to make little gift boxes for each place setting after I received an email for the cut set for these One-Piece Boxes.
We had a large group, so I had a couple of tables to do.
Here are my faves.....
Formal Dining Room
Nook
I only used 2 of the box types available on the cut set.
Lacy Box ~ This box was the easiest. I only had to mess with the size. SVGcuts recommends cutting at 11.5", but I found that it didn't fit properly on the mat. I decreased the size to 11" and was happy with the size.
Box 3 ~ I printed the paper on my Imagine from the Imagine More cartridge. I had to tweak the orientation of the box on my mat with Make the Cut, because of the pattern on the paper. I cut it at a width of 7.5" and height of 11.25" after turning the box to 90 degrees. I added a couple of punched leaves to the top of the box and black curling and gold ribbon.
Sunday, December 18, 2011
Gift Card Boxes
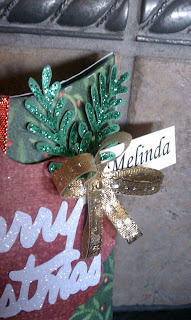
My nieces and nephews live out of state, so gift cards are usually the easiest thing at Christmas time. I'm not thrilled with just popping them in an envelope, I think every gift should be pretty. These gift card boxes hold a gift card with plenty of room for little goodies! I stuffed mine with Reese's Christmas trees, Snickers toy soldiers, York Peppermint Patties and Hershey's Santas!
They were cut from the Cricut Close to my Heart Art Philosophy cart and Cricut Wild Card.
The boxes were cut at 8 1/2 inches from Art Philosophy. The title frames were also cut from Art Philosophy and should be sized based on how you would like to embellish them. The Merry Christmas title was cut from Wild Card.
The name tags were printed from my computer and embellished with glittered punches and handmade bows secured with brads.
I hope they enjoy receiving them as much as did making them!
Monday, December 12, 2011
Christmas Cards

This year I FINALLY did it! I started my cards in August and got them finished and in the mail last week. I'm usually scurrying to the Post Office on Christmas Eve and calling them "Holiday" Cards.


I LOVE this Tri Fold Shutter Card...it's easy and I think it really makes a statement. The tutorial can be found at Splitcoast Stampers

I used a vintage Christmas Paper Pack and Merry Christmas Sizzix Embossing Folder.

The Christmas tree was cut from the Cricut "Trim the Tree" cartridge. It was cut at 4 1/2 inches. The Garland and Toy Soldier were cut from Cricut "Joys of the Season" cartridge.
Saturday, December 10, 2011
Home for Winter Break


Coming home for Winter Break, Kenji was excited to see that some Holiday traditions don't change even when you go away to College.
He woke up to find his Advent Calendar filled with goodies and awaiting his arrival.
I LOVE this Advent Calender that was made from a kit that was purchased from SVGcuts.com and cut with my Make the Cut software. The papers are from Basic Grey's Figgy Pudding and Fruitcake collections.
Thursday, December 8, 2011
Kimekomi Ornaments

Okay....I guess it's time to take this blog a bit more serious. My crafting pals are putting me to shame!
I participated in 2 ornament exchanges this past weekend and here are my contributions!
When my "Colorado Crafting Circle" suggested we do a handmade ornament swap, I wanted to come with something unique. I scoured the internet and found a great post on youtube which led me to ornamentdesigns.com. This gal's work is magnificent. She uses a Japanese technique called Kimekomi. I KNEW I had to embrace my inner Asian and master this new technique. Well, let's just say it wasn't as easy as she made it look, but after spending a small fortune at Hobby Lobby to complete my project, I was determined to pull up my "big girl panties" and get 'er done!
Ornamentdesigns.com has great instructions (with video) on all her designs. I'll be visiting this site often.
I also invested in a Kimekomi tool at http://www.japanesetemari.com/kk/japanese-kimekomi.html and bought the book, Japanese Kimekomi, Fast, Fun and Fabulous Fabric Handballs by Barbara B. Seuss and Kathleen M. Hewitt for the patterns (trust me, it makes the job SO much easier).
The sequined ornament takes about 24 man-hours to complete, but it's SO worth it! The tucked ornament takes about 4 hours.
Rob wants me to make some for our tree, but in different colors. Not sure that's going to happen this Christmas, but I've got my sequins ordered from www.ccartwright.com and I'll get a jumpstart on next year!
Subscribe to:
Posts (Atom)


